Halloween is just around the corner, and what better way to embrace the spooky spirit than by transforming your porch and yard into a hauntingly delightful spectacle? In this article, we will explore some frightfully fantastic ideas for outdoor Halloween decorations that are sure to make your porch and yard the talk of the neighborhood. Grab your broomsticks and dive into a world of spine-tingling creativity!
1. Spooky and timeless themes for outdoor Halloween decorations
When it comes to outdoor Halloween decorations, there are spooky and timeless themes that never fail to captivate the imagination.
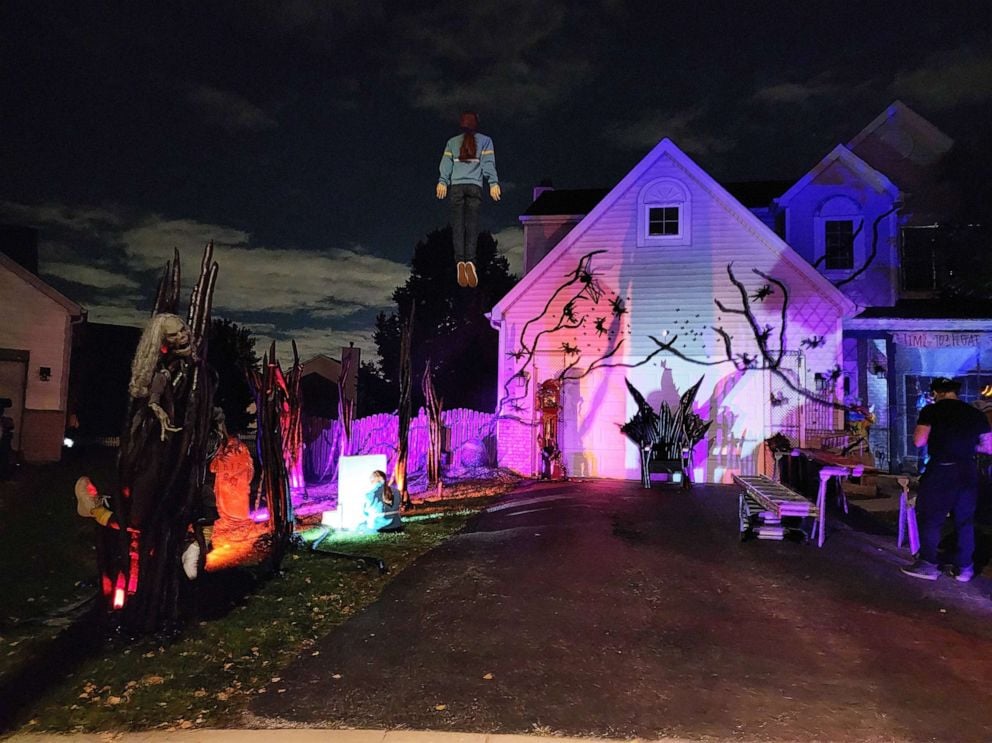
1.1. Stranger Things
To bring the eerie world of Stranger Things to your outdoor Halloween decorations, follow these simple steps.
Firstly, you can use vintage bikes and flickering lights to set the scene with a Hawkins Bike Brigade display. Then, recreate the iconic Alphabet Wall with painted boards and backlighting for an instantly recognizable touch.
You can also craft a spooky Demogorgon Lair using black fabric and a life-sized prop. Carve or paint Stranger Things-themed pumpkins with logos, characters, or symbols. Complete the look with red and blue string lights.
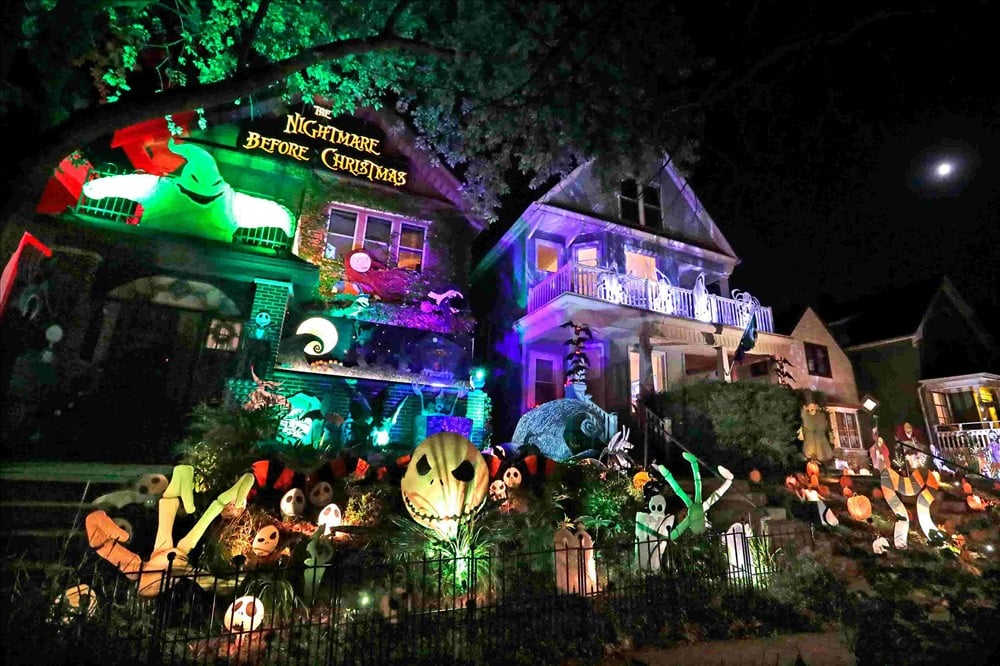
1.2. The Nightmare Before Christmas
To bring the whimsical and spooky world of "The Nightmare Before Christmas" to your outdoor Halloween decorations, you should feature Jack Skellington by placing a life-sized Jack prop on your porch or yard. Don't forget to add eerie lighting with purple, green, and orange string lights to capture the movie's color palette.
You can also scatter tombstone props or cutouts throughout your yard, paying homage to the Graveyard Scene from the film and incorporate pumpkins decorated with Jack's face or other characters for a festive touch. Finish with a spooky wreath featuring elements like black roses, spiderwebs, and skeletal hands.
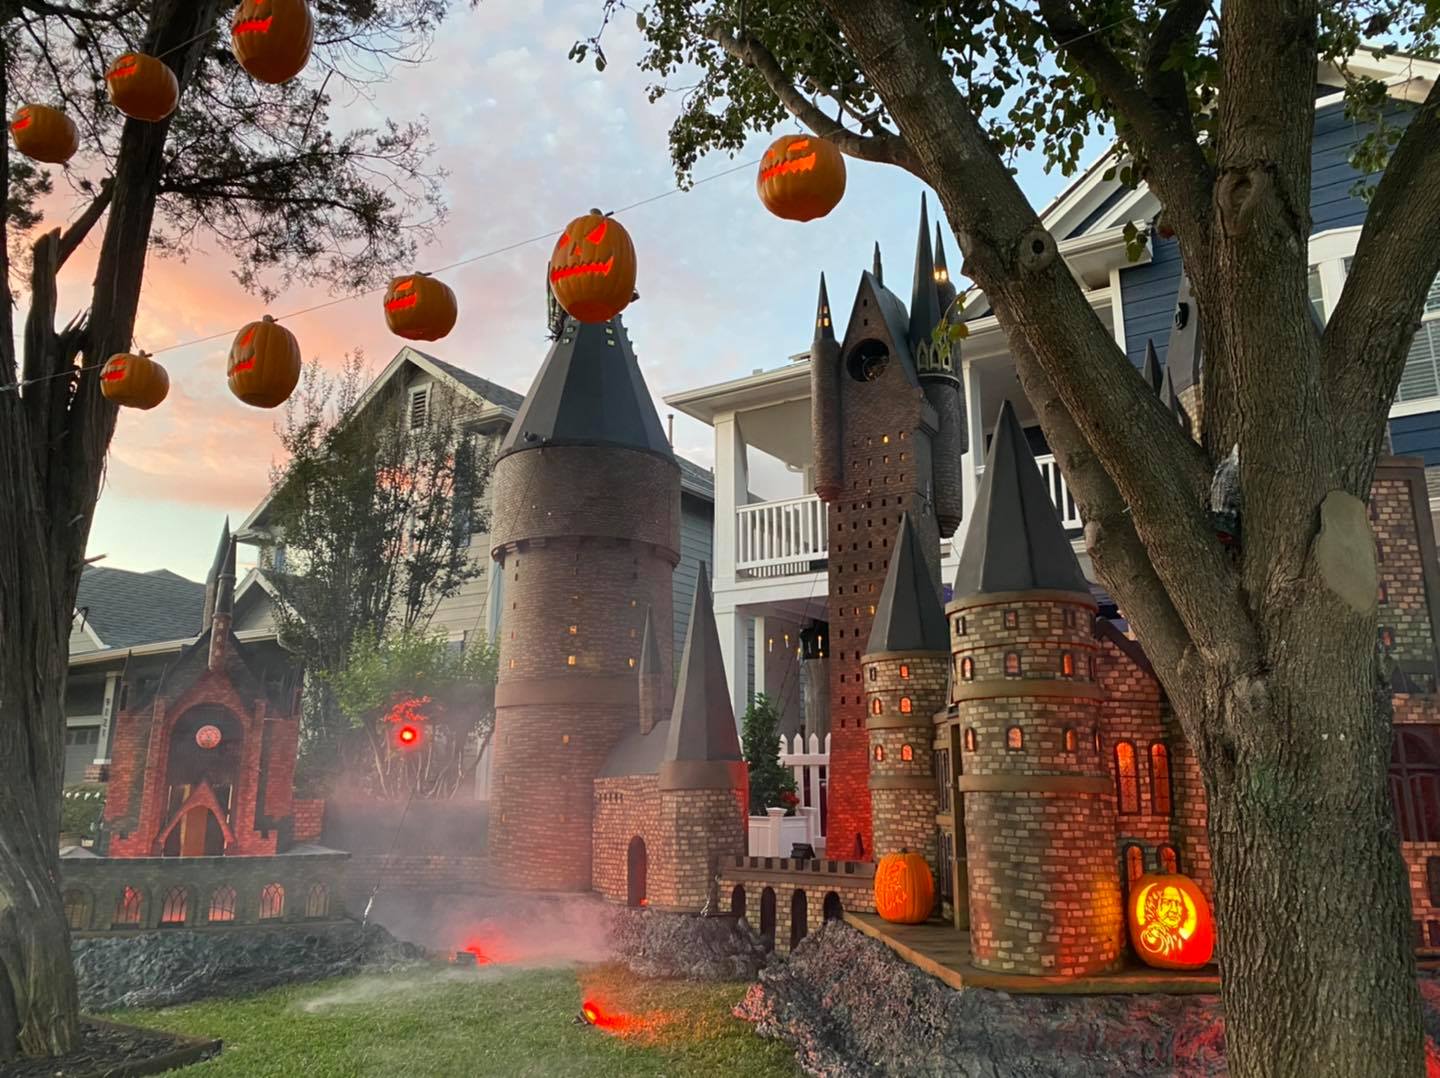
1.3. Harry Potter
You can start with creating a magical entrance by hanging a sign that reads "Platform 9¾" near your front door. Decorate your porch with floating candles using suspended LED tea lights to recreate the Great Hall's enchanted ceiling. You can also add a touch of witch vibe by placing broomsticks or a Nimbus 2000 prop on display.
Don't forget to recreate the cauldron scene by placing a large cauldron filled with ice for an eerie effect. Scattering potions and spellbooks around your outdoor space is an amazing idea for an authentic look. Finally, you can carve pumpkins with iconic Harry Potter symbols like lightning bolts or the Deathly Hallows.
1.4. Haunted Mansion
You can transform your outdoor area into a Disney's Haunted Mansion-inspired Halloween display. Just adorn your porch with ghostly white sheets draped over furniture or hung from tree branches to mimic ethereal spirits. Next, hang flickering lanterns or vintage-style sconces to create a haunted mansion ambiance.
You can also incorporate cobwebs, spiders, and other creepy crawlies throughout your outdoor space to capture the spooky essence of the Haunted Mansion. Last but not least, add a haunted chandelier or candelabras to complete the eerie aesthetic. Prepare spooky organ music or haunting sound effects to immerse visitors in the macabre atmosphere of the Haunted Mansion.
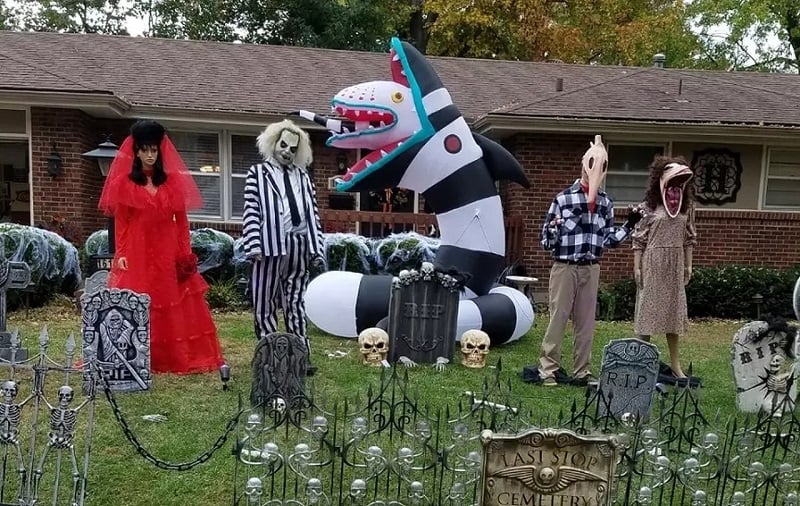
1.5. Beetlejuice
To create a delightfully spooky atmosphere inspired by "Beetlejuice" for your outdoor Halloween decorations, follow these easy steps. Start with incorporating black and white striped elements throughout your porch or yard to capture the iconic aesthetic of the movie. Then, set up a Beetlejuice graveyard scene with tombstone props and eerie fog effects, reminiscent of the movie's ghostly settings.
You should add props of green accents to represent the eccentricity of the characters, such as green lights or glowing green decorations. Hang signs or banners that reference memorable quotes from the film, like "It's Showtime!" or "Betelgeuse, Betelgeuse, Betelgeuse!". Complete the spooky look with whimsical and slightly chaotic elements, just like the character Beetlejuice himself.
>>> Read more: Halloween decorations: The BEST spooktacular ideas for a boo-tiful space
2. Best ideas for outdoor Halloween decorations
When it comes to creating a memorable Halloween ambiance, outdoor Halloween decorations play a crucial role. To help you craft a spine-chilling spectacle, we have compiled some of the best ideas for outdoor Halloween decorations.
2.1. Outdoor Halloween decoration ideas for the porch
Here are some outdoor Halloween decorations specifically for the porch that will send shivers down the spines of visitors.
- Front door wreath
- Mason jar Jack 'O lanterns
- Cobweb-covered doors
- Hay bales
- Large spiders
- Spooky Halloween signs
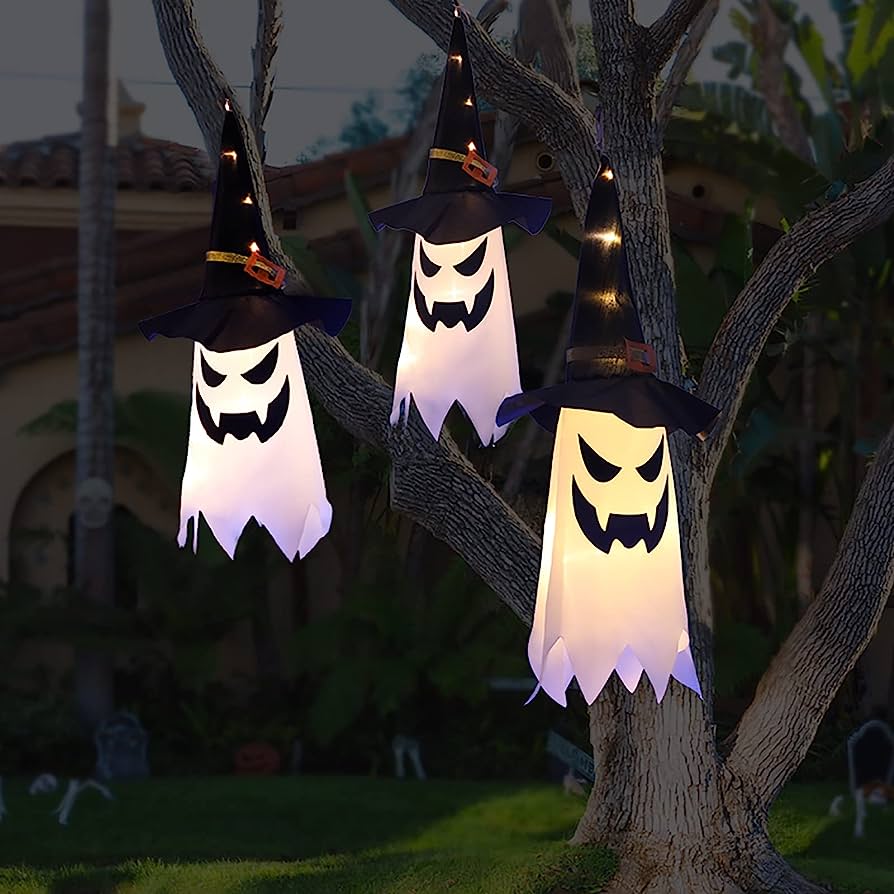
- Hanging witch hats
- Banister white ghosts
- Fence with skulls
- Hanging skeletons

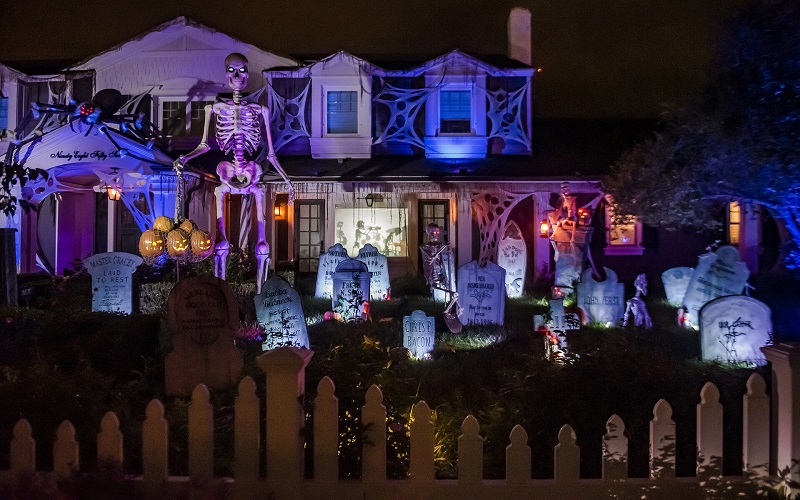
2.2. Outdoor Halloween decoration ideas for the front and back yard
Here are some outdoor Halloween decorations to transform your yard into a haunted haven.
- Graveyards
- Witch circles
- Creepy creatures
- Zombies
- Box with a scary clown mask
- Crypt entrance
- Flying demon girls
- Michael Myers sitting on a chair
- Scary graves
- People-eating Halloween tree with lighted eyes

>>> Read more: Halloween costumes: The BEST ideas for kids, teens, adults, pets and more
3. Top 10 easy DIY homemade outdoor Halloween decorations that last with time
If you are looking for easy DIY homemade outdoor Halloween decorations that stand the test of time, we have got you covered. Here are the top 10 ideas that are not only simple to make but also durable enough to withstand the year.
3.1. Paper lantern hanging ghosts
- Gather white paper lanterns of various sizes.
- Cut out ghostly shapes from white tissue paper or white cloth, ensuring they are larger than the lanterns.
- Attach the ghostly shapes to the bottom of the lanterns using tape or glue, allowing them to drape down and cover the lanterns.
- Add facial features to the ghosts using markers or black paper cutouts, creating spooky expressions or eyes.
- Attach strings to the top of the lanterns to create hanging loops.
- Hang the paper lantern ghosts from tree branches, porch ceilings, or other desired locations using hooks, strings, or branches.
- For an eerie effect, consider adding LED tea lights or glow sticks inside the lanterns to create a soft, ghostly glow.
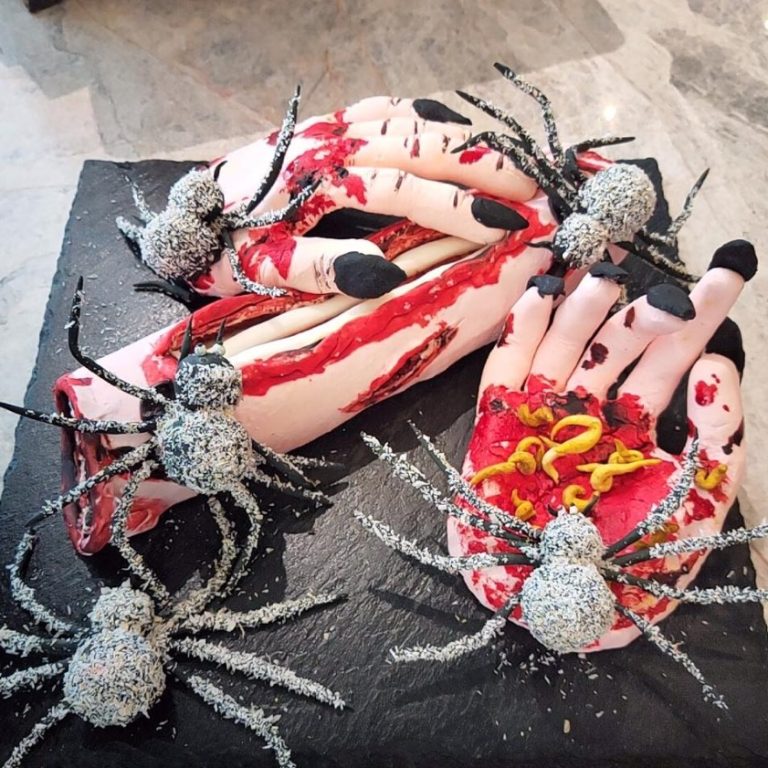
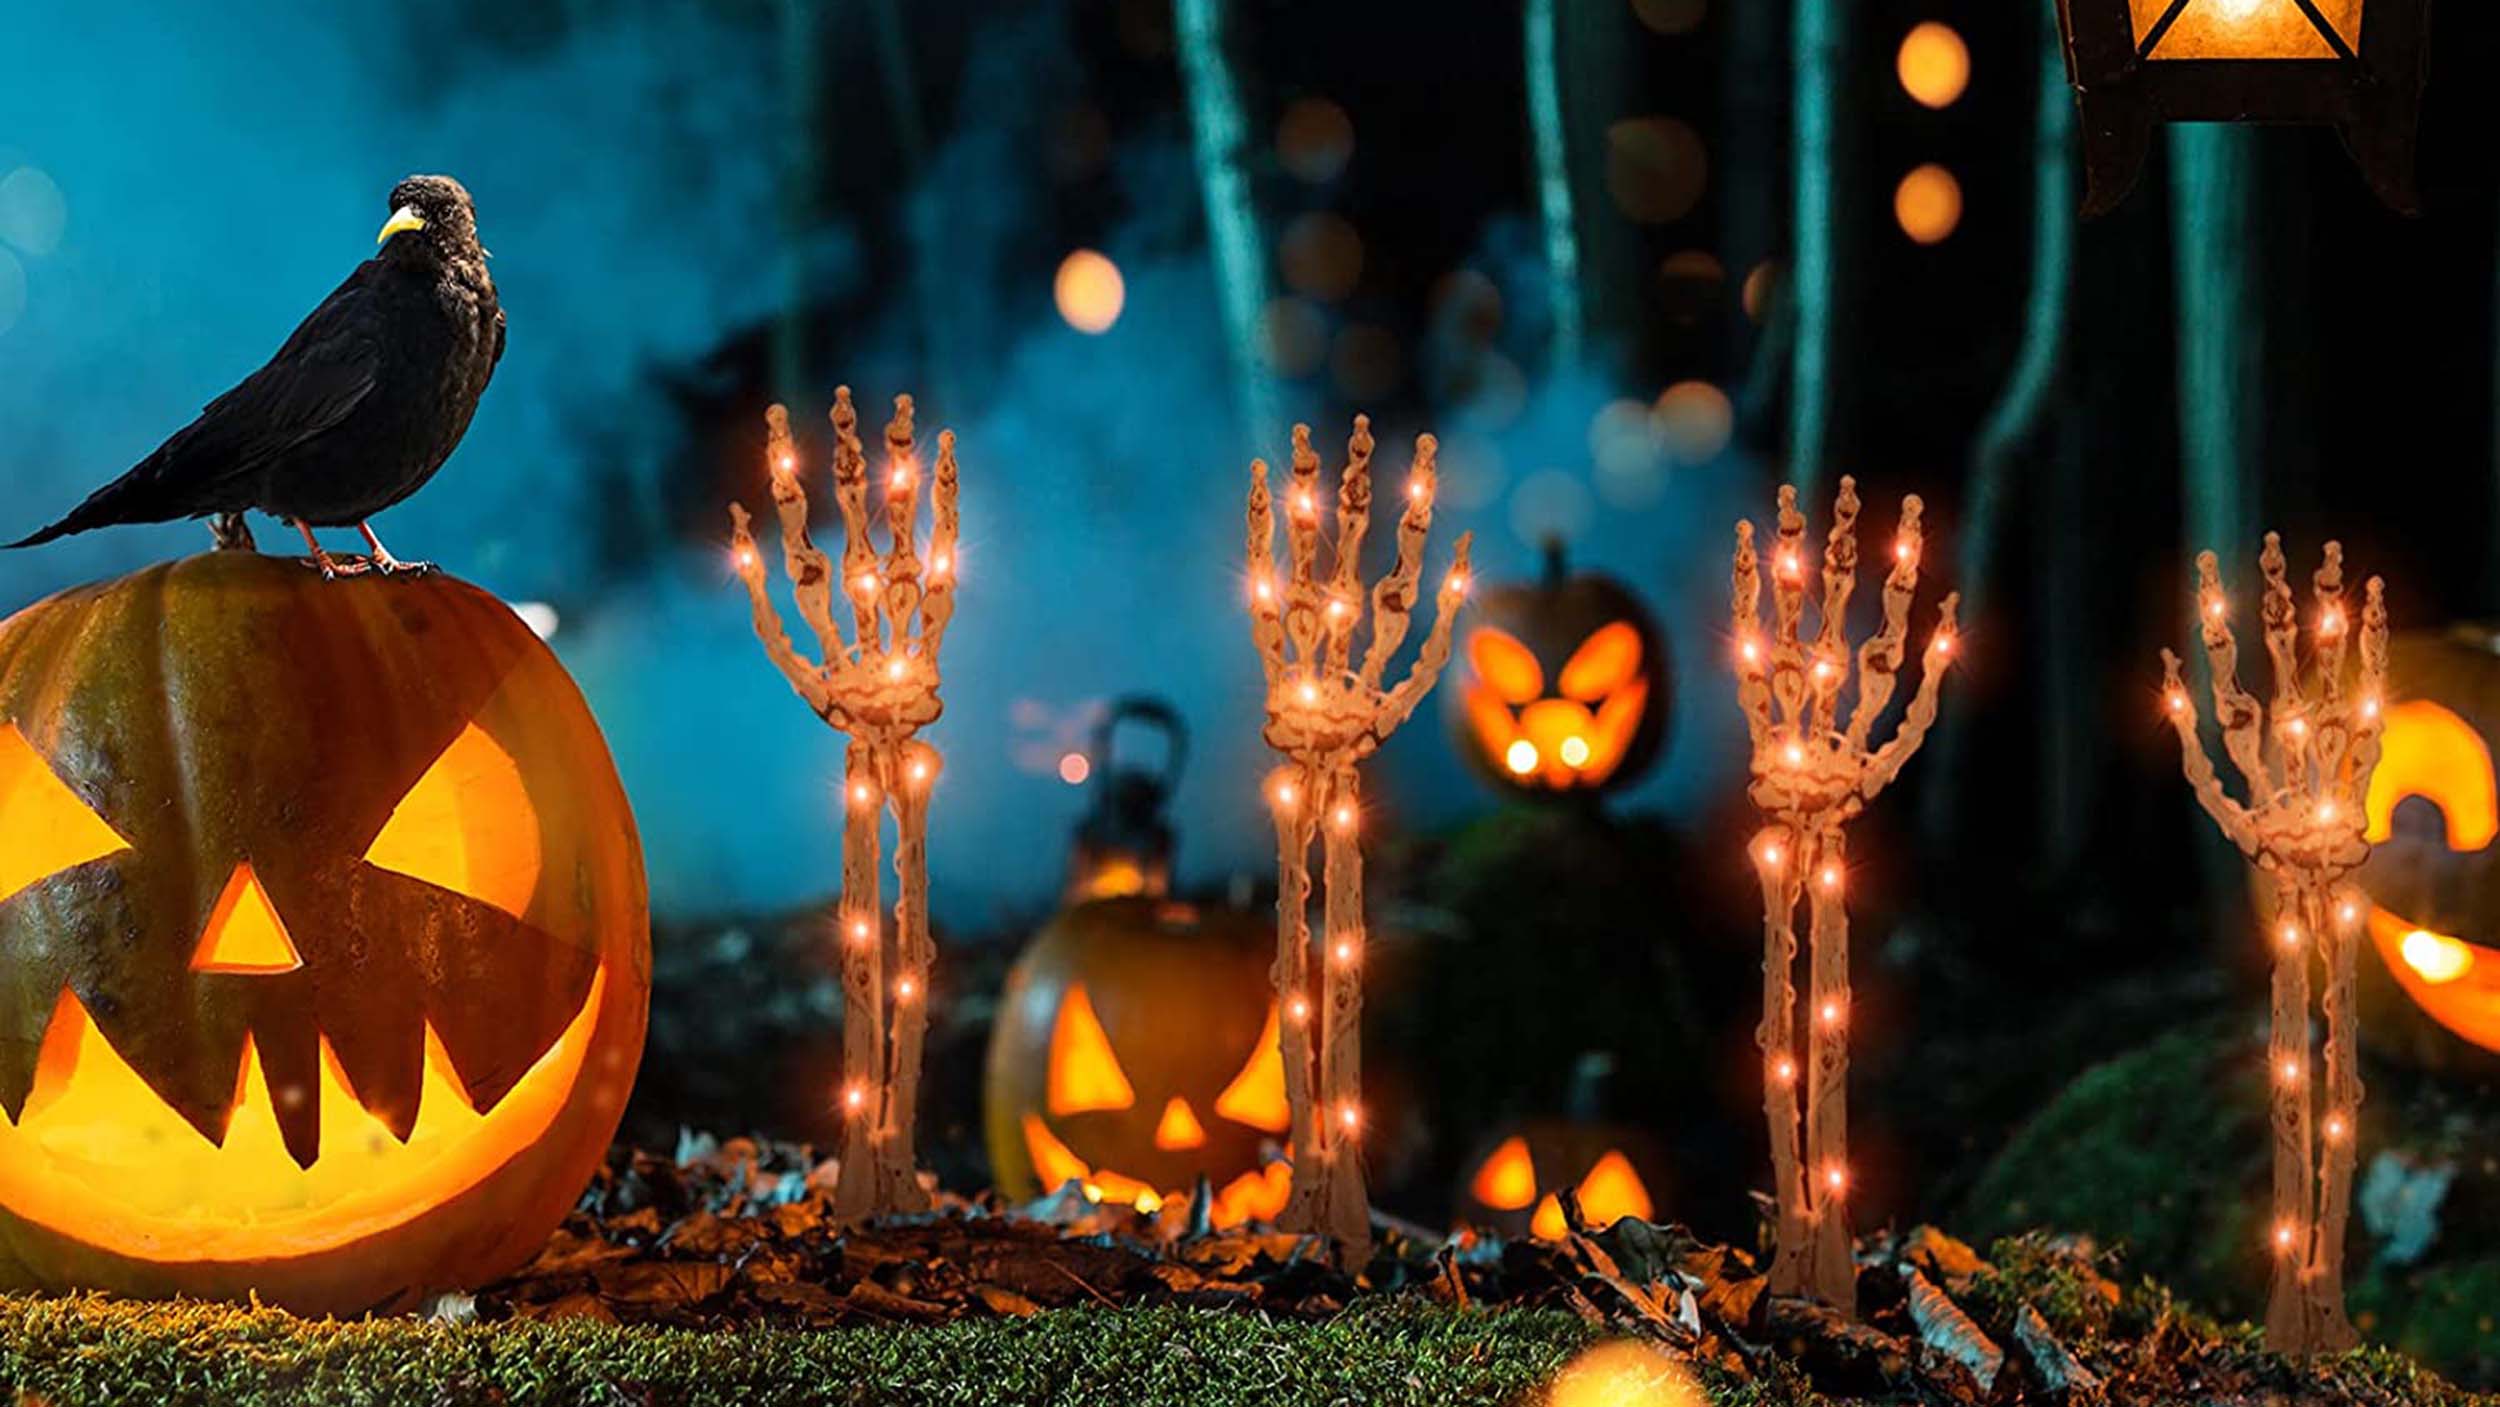
3.2. Zombie planted hands
- Decide on the desired location for your "zombie" severed hands and prepare the area accordingly.
- Gather your severed hands, which can be store-bought or DIY creations.
- Fill your flower pots or containers with dirt, leaving enough space for the hands to be planted.
- If needed, insert small skewer sticks into the base of the severed hands. This will help you position the hands securely in the pots. Alternatively, you can bury the hands directly in the dirt without skewers.
- Plant your severed hand by inserting it into the pot, making sure it is firmly anchored in the soil.
- Adjust the positioning of the hands as desired, ensuring they create a spooky and realistic effect.

3.3. Floating head hanging ghosts
- Start by gathering white balloons and lightweight white fabric or cloth.
- Cut the fabric into large squares or rectangles, ensuring they are big enough to cover the balloons.
- Inflate the balloons to the desired size, leaving a small portion uninflated for the ghost's head.
- Drape the fabric over each balloon, covering it completely. Allow the fabric to hang down loosely to create a ghostly shape.
- Secure the fabric around the base of the balloon using strings or rubber bands, creating a neck-like appearance.
- Use markers or black paper cutouts to draw or create ghostly facial features on the uncovered portion of the balloon.
- Attach strings to the top of each balloon to create hanging loops.
- Hang the floating head hanging ghosts from tree branches, porch ceilings, or other desired locations using hooks, strings, or branches.
- If desired, create a spooky effect by adding LED tea lights or glow sticks inside the balloons before inflating them, creating an eerie glow.
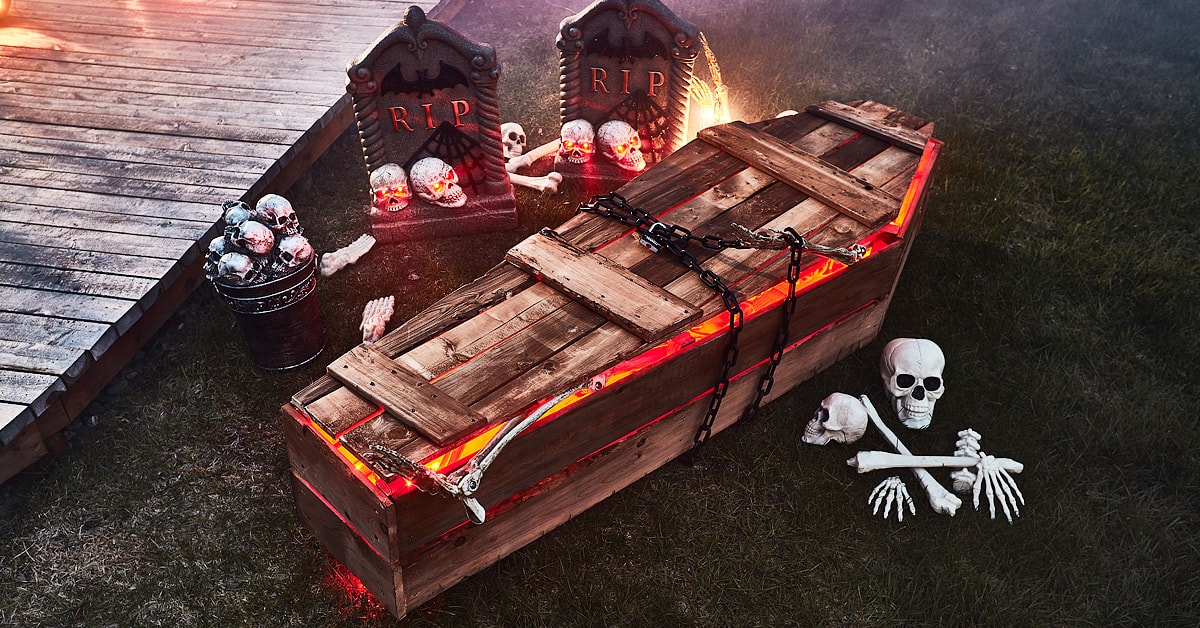
3.4. Halloween rustic wood coffins
- Gather wooden planks or reclaimed wood boards of appropriate size for the coffin. You will need six long pieces for the sides and lid, and several shorter pieces for the support.
- Measure and cut the wooden planks to the desired dimensions for your coffin. Ensure you have two longer planks for the sides, two for the ends, one for the bottom, and one for the lid.
- Assemble the coffin by aligning the side planks with the end planks. Attach them securely using nails, screws, or wood glue.
- Install the bottom plank by attaching it to the side and end planks, reinforcing with additional supporting pieces as needed.
- Attach the lid plank to the top of the side and end planks using hinges, allowing the lid to open and close.
- Decorate the coffin with Halloween-themed embellishments, such as cobwebs, plastic spiders, faux chains, or spooky signs.
3.5. Graveyard
- Choose an area in your yard or outdoor space to create your graveyard.
- Clear the area of any debris or obstacles to prepare a flat surface for your graveyard.
- Use stakes or wooden boards to mark out the boundaries of individual graves or tombstones within the graveyard.
- Create tombstones by cutting shapes out of large pieces of foam board or cardboard. Customize the shapes to resemble classic tombstone designs with pointed tops or elaborate engravings.
- Use black or gray paint to give the tombstones an aged and weathered appearance. Add details such as cracks, moss, or inscriptions using a contrasting color of paint or marker.
- Position the tombstones within the marked boundaries, partially burying them in the ground or using stakes for stability.
- Add additional elements to enhance the graveyard, such as faux spiderwebs, cobwebs, or skeletons emerging from the ground.
- Scatter dried leaves or faux foliage around the graves to create an eerie atmosphere.
- Consider adding props like a fog machine, eerie lighting, or spooky sound effects to enhance the ambiance of your graveyard.

>>> Read more: Halloween movies: 85 BEST suggestions to satisfy your spooky cravings
3.6. Halloween candy door hanger
- Gather materials such as a wooden dowel or rod, ribbon or string, festive Halloween-themed fabric, hot glue gun, scissors, and assorted Halloween candies.
- Cut the Halloween-themed fabric into a rectangular shape, ensuring it is wide enough to cover the candies when folded.
- Fold the fabric in half lengthwise, creating a pocket-like shape.
- Use the hot glue gun to secure the sides of the fabric together, leaving the top open.
- Insert the assorted Halloween candies into the fabric pocket, filling it to your desired amount.
- Fold the top of the fabric pocket over the candies and secure it with hot glue, creating a neat closure.
- Attach a length of ribbon or string to the top of the candy-filled fabric pocket, tying it securely.
- Take the wooden dowel or rod and tie the other end of the ribbon or string to it, creating a loop.
- Hang the candy door hanger on your front door or any desired location by placing the loop over a hook or nail.

3.7. Glow in the dark pumpkin
- Start with a clean and dry pumpkin, preferably one with a smooth surface.
- Choose glow-in-the-dark paint in your desired color. Green or white are popular choices for a spooky effect.
- Shake the glow-in-the-dark paint bottle well to ensure it is thoroughly mixed.
- Apply a base coat of regular acrylic paint to your pumpkin. This will help enhance the glow-in-the-dark effect.
- Once the base coat is dry, apply an even layer of glow-in-the-dark paint to the entire surface of the pumpkin. Use a brush or sponge to ensure smooth coverage.
- Allow the glow-in-the-dark paint to dry completely according to the instructions on the paint bottle.
- For maximum glow, expose the painted pumpkin to bright light or direct sunlight for a few hours. This will charge the glow-in-the-dark paint.
- Once charged, place your glow-in-the-dark pumpkin in a dark or dimly lit area for an eerie glow effect.

3.8. Dead & Breakfast inn signpost
- Gather materials such as a wooden post or plank, paint in desired colors, paintbrushes, stencils (optional), and hooks or chains for hanging.
- Prepare the wooden post or plank by sanding it to ensure a smooth surface.
- Paint the wooden post or plank in a dark or weathered color, such as black or gray, to give it an aged appearance. Allow the paint to dry.
- Using a lighter color of paint, create the text "Dead & Breakfast Inn" on the sign. You can use stencils for precise lettering or freehand it for a more rustic look. Allow the paint to dry.
- Attach hooks or chains to the top corners of the signpost for easy hanging.

3.9. Cemetery fence
- Gather materials such as wooden stakes or dowels, wooden boards or pickets, a saw, a hammer, nails or screws, and black or gray paint.
- Determine the desired length and height of your cemetery fence. Measure and mark the dimensions on the wooden boards or pickets.
- Use a saw to cut the wooden boards or pickets to the desired length. You can create a pointed or curved top for an authentic cemetery fence look.
- Cut the wooden stakes or dowels into shorter lengths to act as fence posts.
- Attach the cut boards or pickets to the fence posts using nails or screws. Ensure they are securely fastened.
- Repeat the process of attaching boards or pickets to the fence posts until you have created the desired length of your cemetery fence.
- Once the paint is dry, find a suitable location for your cemetery fence, such as along the edges of your yard or around a Halloween display.
- Secure the fence posts by pushing them into the ground or using additional supports like stakes or brackets if needed.
- Arrange the cemetery fence in a straight line or staggered pattern, creating a realistic and eerie barrier.

3.10. Concrete lighted step spook
- Gather materials such as a plastic skeleton or skull, concrete mix, a plastic container or mold, string lights or LED lights, a drill, and sandpaper.
- Prepare your plastic container or mold by spraying it with non-stick cooking spray to ensure easy removal of the concrete later.
- Mix the concrete according to the manufacturer's instructions in a separate container.
- Pour the concrete mixture into the prepared mold, filling it to the desired height for your step spook. Leave some space at the top to insert the lights later.
- Carefully place the plastic skeleton or skull into the wet concrete, ensuring it is centered and positioned as desired.
- Use a drill to create holes in the top of the concrete, making room for the lights to be inserted later. Leave enough space between each hole to create an evenly distributed light pattern.
- Allow the concrete to cure and dry completely according to the manufacturer's instructions.
- Once the concrete is fully cured, remove the mold or plastic container, gently tapping or wiggling it if needed.
- Use sandpaper to smooth any rough edges or imperfections on the concrete surface.
- Insert the string lights or LED lights into the holes drilled in the top of the concrete, ensuring they are secured and positioned evenly.
- Plug in the lights and place your concrete lighted step spook on a step or elevated surface, creating a spooky and illuminating effect.
Why not consider combining the excitement of Halloween and immersing yourself in a different culture across the globe? For this, one destination worth considering is Vietnam. Not only does Vietnam offer stunning landscapes and rich history, it also provides unique opportunities to celebrate Halloween.
To make your Vietnam travel even more memorable, consider exploring the hotel and resort system of Vinpearl located in popular destinations such as Phu Quoc, Nha Trang, Hoi An, Da Nang, and Ha Long. Vinpearl offers luxurious accommodations, ensuring a comfortable stay while you indulge in the festive spirit of Halloween.


Additionally, at Vinpearl, don't miss out on the chance to explore VinWonders, a haven of amusement and theme parks. VinWonders offers thrilling rides, immersive attractions, and fascinating shows that will keep you entertained during the Halloween season. It is a fantastic opportunity to immerse yourself in the festive atmosphere while creating lasting memories.
>>> Book rooms in Vinpearl Phu Quoc, Vinpearl Nha Trang, Vinpearl Resort & Golf Nam Hoi An, Vinpearl Resort & Spa Ha Long to have a pleasant stay during your holiday!
Transforming your porch and yard into a spooktacular Halloween wonderland with outdoor decorations is a thrilling way to embrace the spirit of the season. From creepy cobwebs and eerie lighting to ghostly apparitions and haunted graveyards, these outdoor Halloween decorations will captivate the imagination and delight both guests and trick-or-treaters alike.